
Turn any TV into digital signage with a $15 Raspberry Pi Zero 2 W
A Raspberry Pi Zero 2 W can run a full digital signage screen. This step-by-step guide takes you from an empty SD card to a playing TV, with the first 2 screens free.
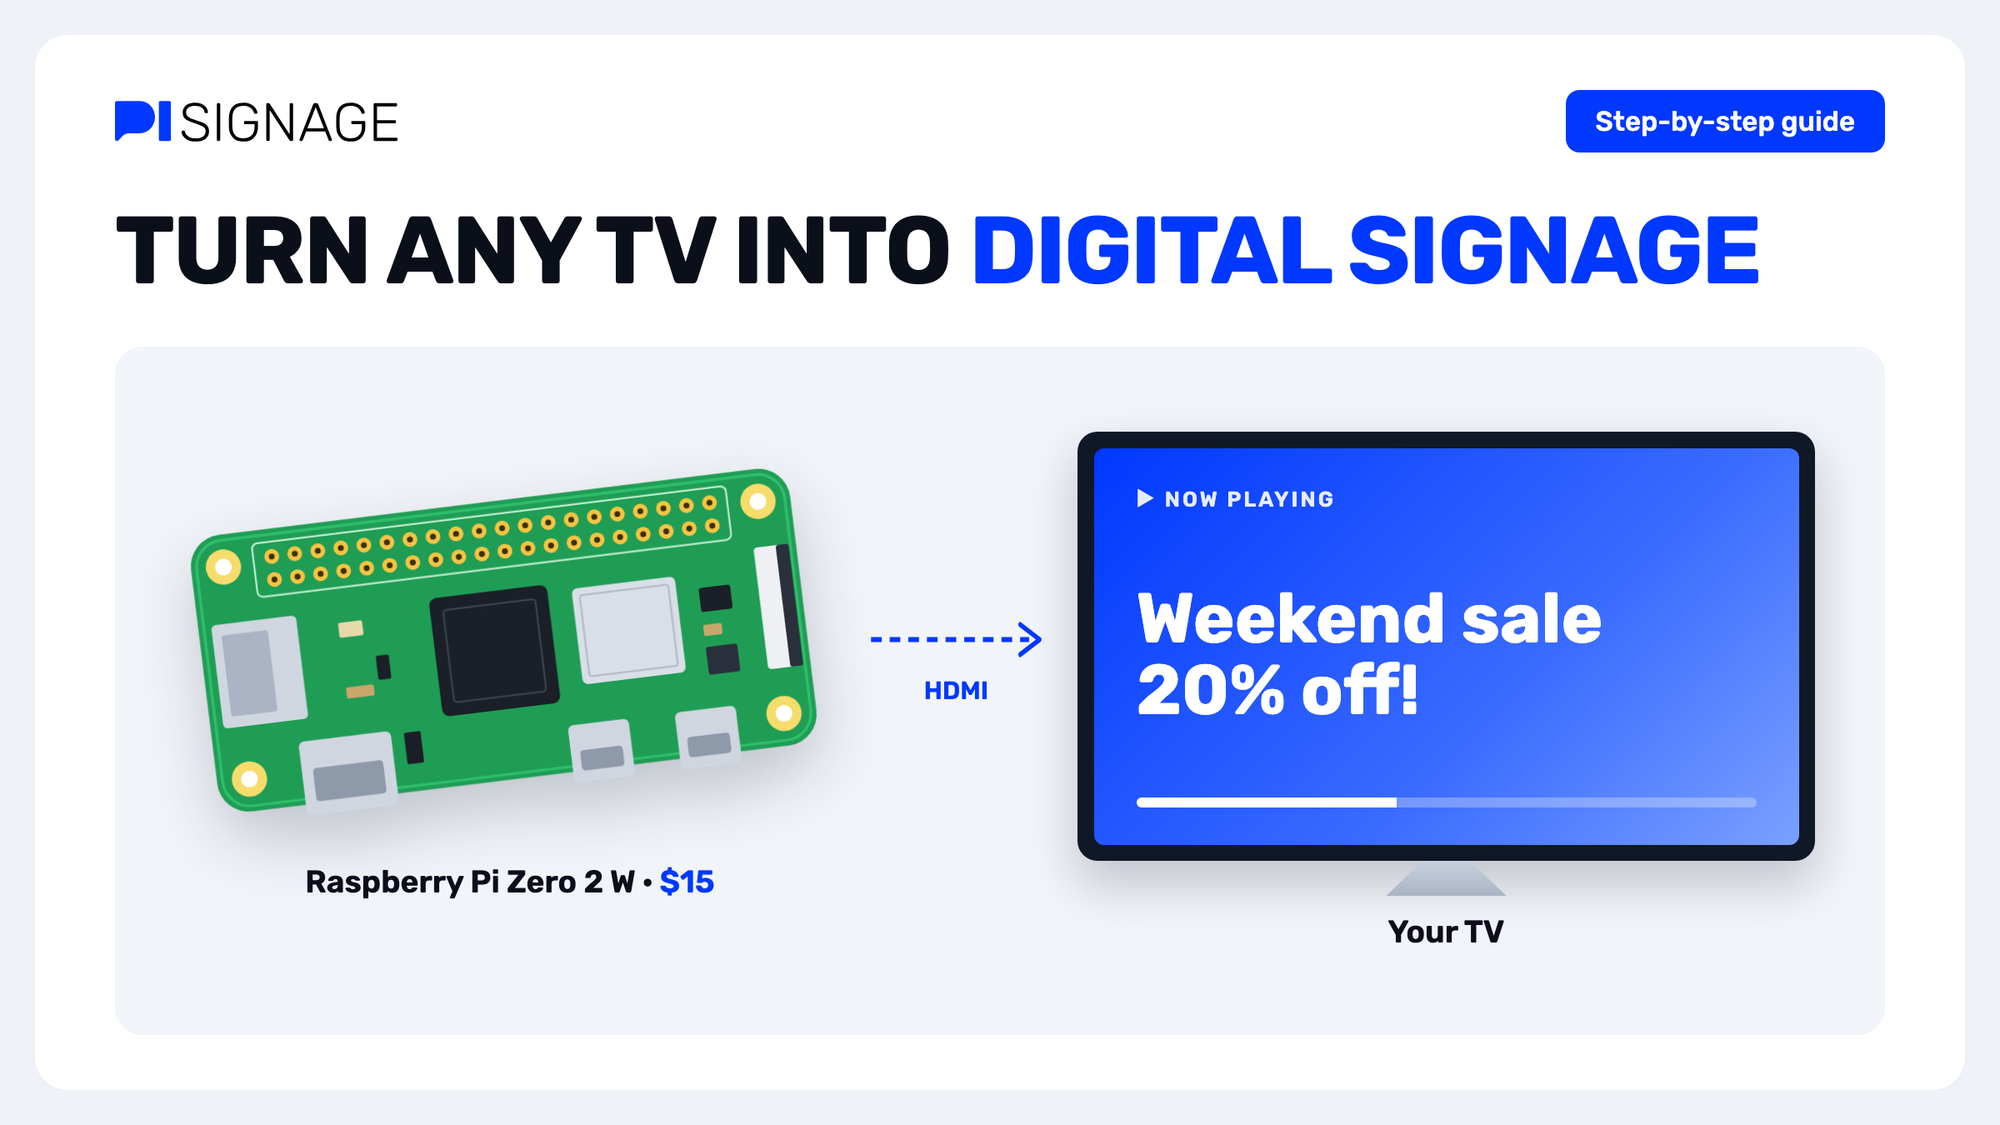
A Raspberry Pi Zero 2 W, the $15 board smaller than a credit card, can run a full digital signage screen: images, videos and PDFs, on a schedule, managed from a browser. This guide takes you from an empty SD card to a playing screen in about 30 minutes, using PiSignage and its new web interface.
A menu board, a notice screen or a shop-window display shows one thing at a time. That job does not need a powerful computer. PiSignage player 5.6 added a new media player for the Zero 2 W that plays video with the board's hardware decoder, so a 512 MB board is enough.
Can a Raspberry Pi Zero 2 W run digital signage? Yes. With the PiSignage player image it plays images, PDFs and H.264 video up to 1080p on any HDMI TV, and you manage it from a browser. The board costs $15 and the first 2 screens are free.
New to PiSignage? This one-minute video shows what it does:
What you need
The board is the only part you may need to buy; most people already have the rest.
- Raspberry Pi Zero 2 W: $15 list price. A Raspberry Pi 3 works the same way with its own image.
- microSD card: 16 GB or larger, Class 10. The player image is 2.0 GB; the rest holds your media.
- Mini-HDMI to HDMI cable or adapter: the Zero 2 W has a mini-HDMI port.
- Micro-USB power supply: 5 V, 2.5 A. A weak supply causes random reboots.
- TV or monitor with HDMI: any size. 1080p is the best match for this board.
- Wi-Fi network: the Zero 2 W has no Ethernet port.
- A computer with an SD card reader: used once, to write the image.
Step 1: Create a free PiSignage account
Sign up at pisignage.com. The first 2 screens on an account are free, with no time limit, so this project costs nothing beyond the hardware.
After you sign in you land in the new interface. The left menu has the four places this guide uses: Screens, Groups, Assets and Playlists.
Step 2: Write the player image to the SD card
PiSignage publishes a ready-made image for this board, so there is no operating system to install or configure.
- Open pisignage.com/downloads and download the Raspberry Pi Zero 2 W Image (version 5.6.1, 32-bit, 2.0 GB).
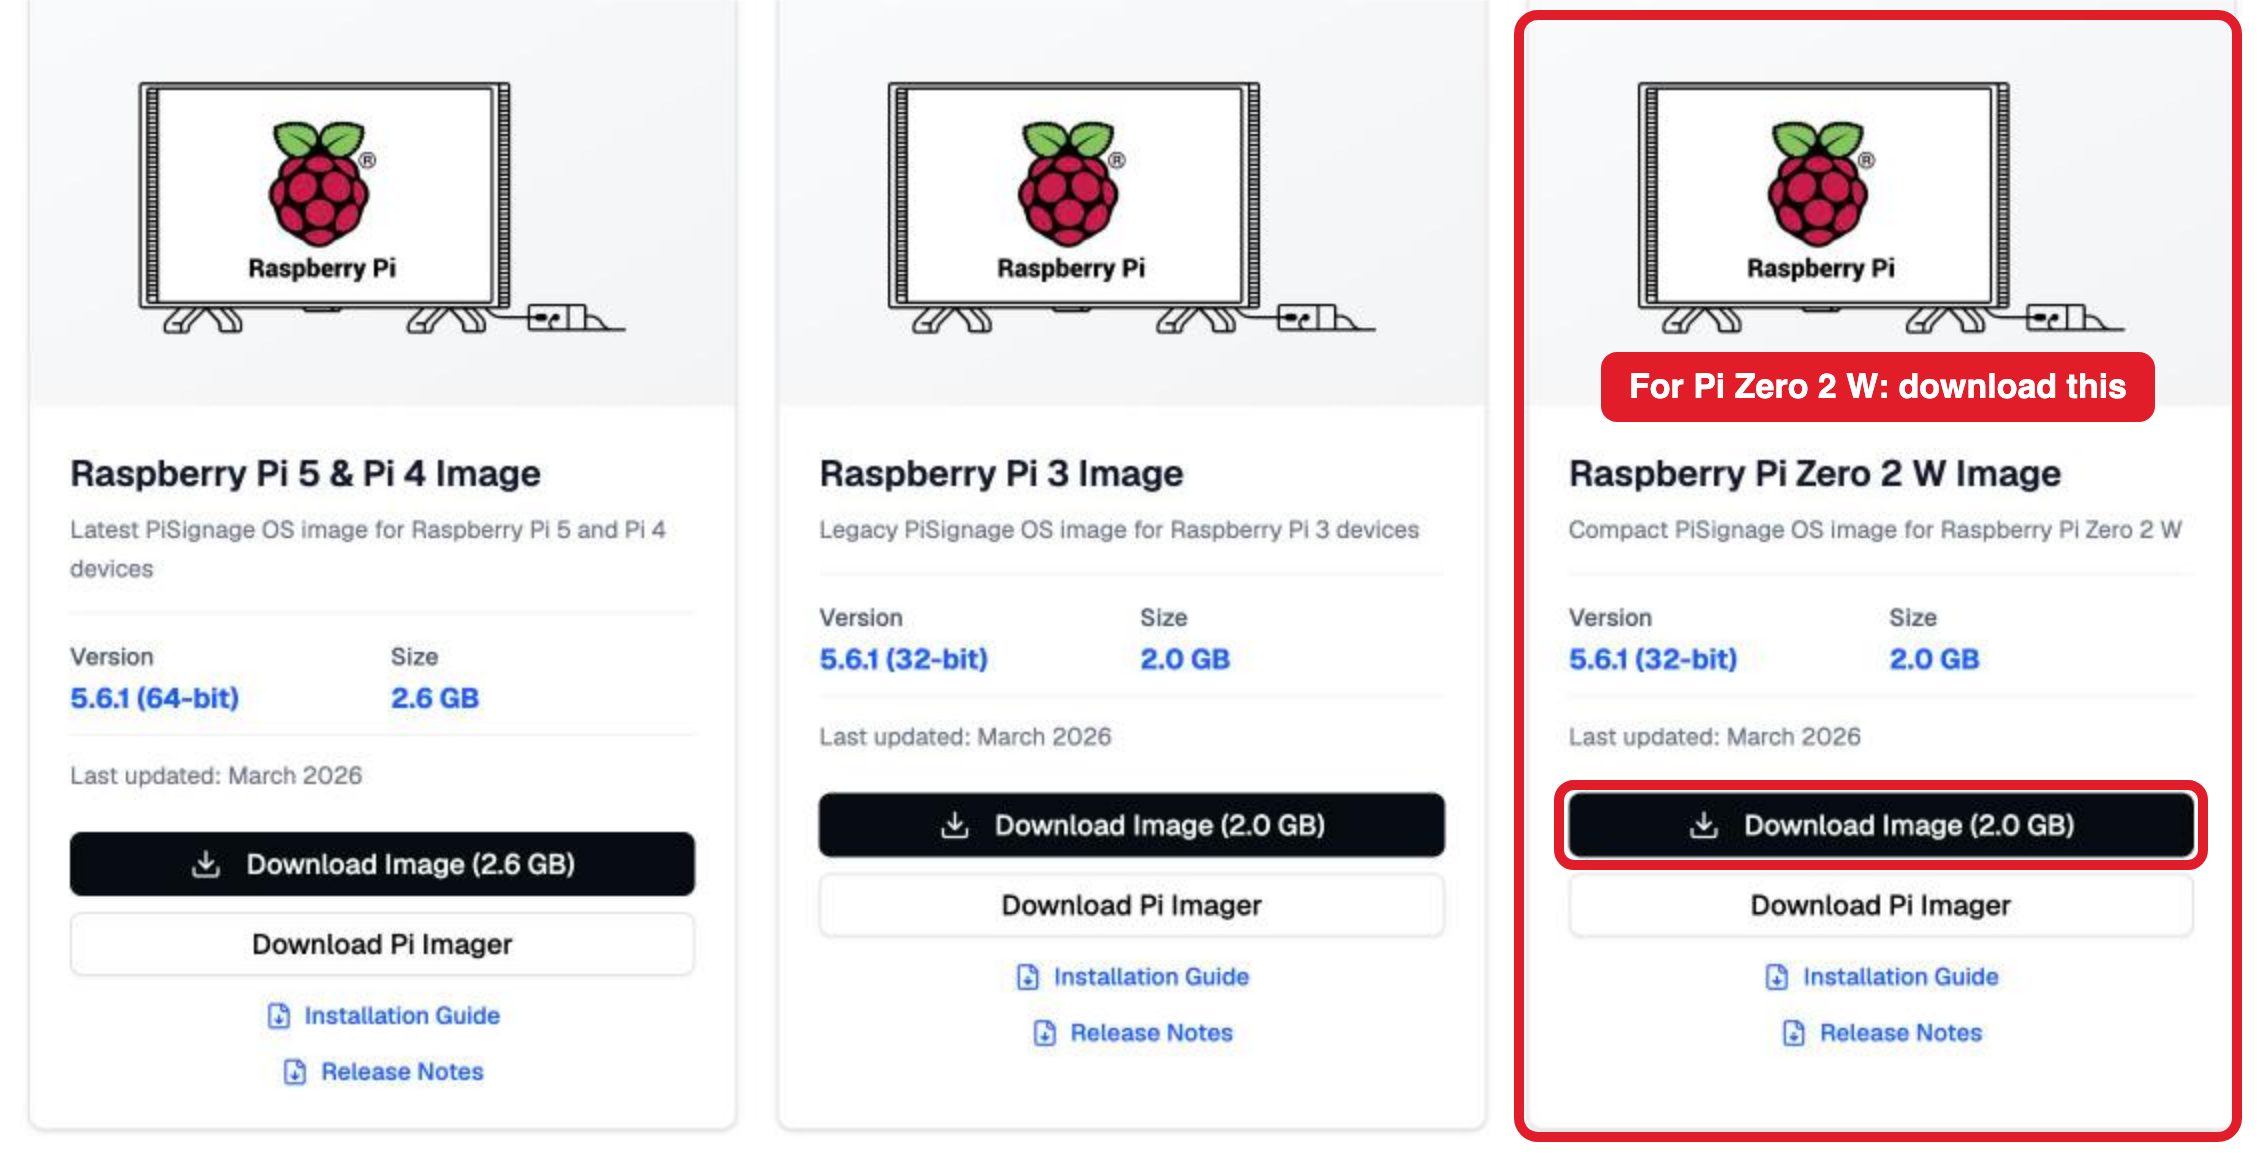
The downloads page has three Raspberry Pi images. For this board, use the one marked in red.
- Install Raspberry Pi Imager on your computer.
- In Imager, choose Use custom as the operating system and select the downloaded file.
- Choose your SD card and write the image. It takes about 10 minutes.
PiSignage also has a setup video that shows these steps.
Step 3: Boot the board and register the screen
Put the SD card in the Zero 2 W, connect the TV and plug in the power. After the first boot the TV shows a Welcome screen with a 16-digit player ID. That ID is how your account finds this board.
Connect it to Wi-Fi. With no network yet, the Welcome screen tells you what to do:
- On your phone or laptop, join the Wi-Fi network the player creates, named
piplayer_followed by the last 4 characters of the player ID. - Open
http://192.168.100.1:8000/settingsin a browser and enter your Wi-Fi name and password.
If you have a USB keyboard and an adapter, pressing Ctrl+N or F6 on the player opens the same network settings.
Register it in your account. In the PiSignage interface, open Screens and click Add Screen.
- Screen Name: anything you will recognise, such as "Shop window".
- Screen ID: the player ID shown on the TV.
- Group: leave the default group for now.
- Timezone: your local timezone, so schedules run at the right hour.
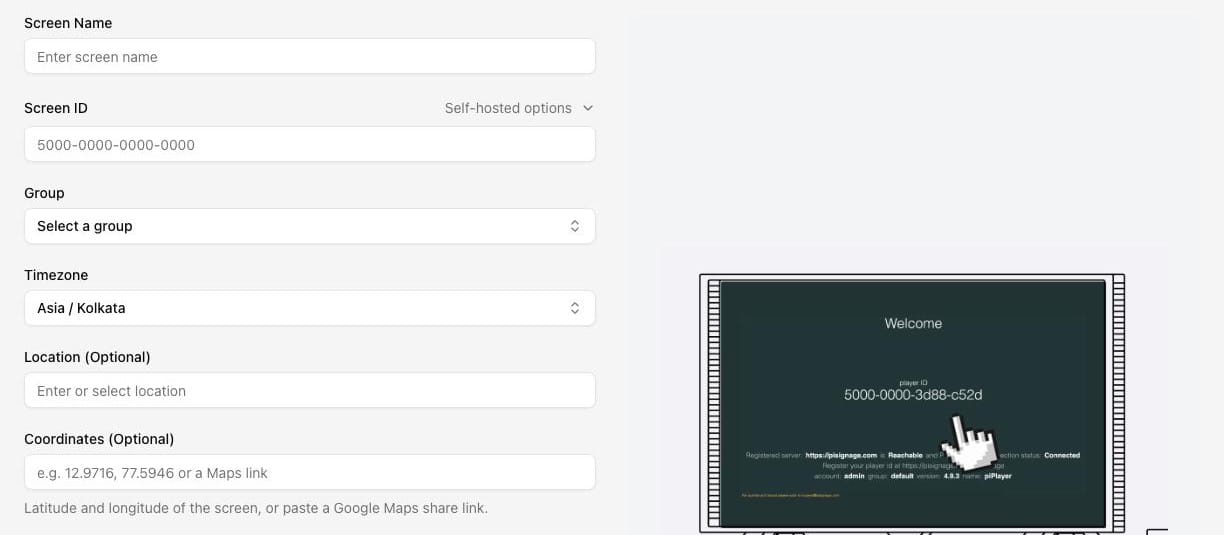
The Add Screen form. The picture on the right shows where to find the player ID on your TV.
Save it. Within a minute the screen appears in the list with its model shown as Raspberry Pi Zero Player.
Step 4: Upload your content and build a playlist
Upload. Open Assets and click Add Asset. Add the images, videos and PDF files you want on the screen. For this board, use JPG or PNG images and H.264 MP4 videos at 1920x1080 or smaller.

The Assets page. Uploaded files can be shown as a table, a grid or in folders.
Build the playlist. Open Playlists and click Create Playlist. Give it a name, then click Add Assets and pick the files you uploaded.
Each row in the playlist is one item on the screen:
- Drag the handle on the left to change the order.
- The number under Controls is how many seconds an image stays up. For a video it is filled in with the video's length.
- Preview shows the playlist in your browser before it goes to the screen.
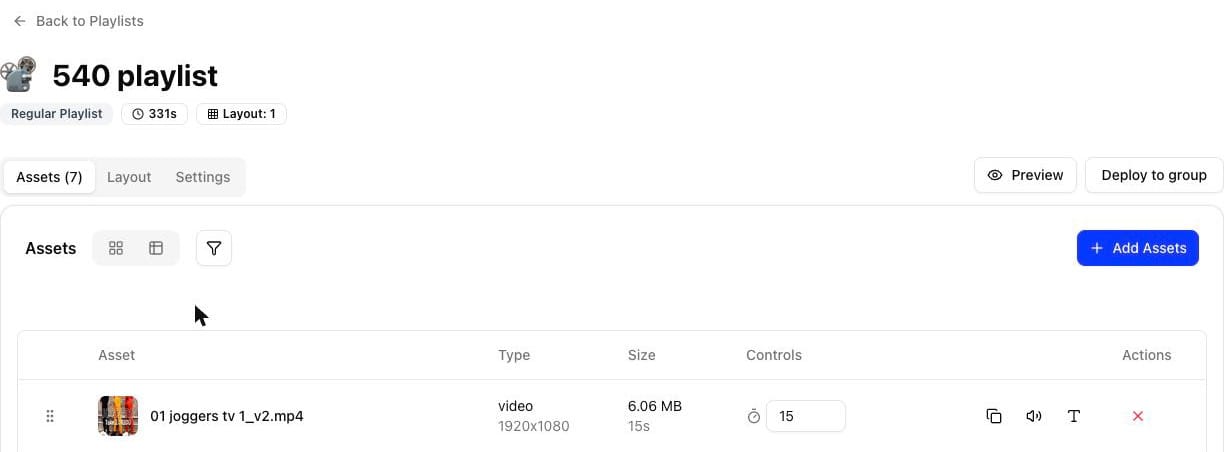
A playlist in the editor, with Preview and Deploy to group at the top right.
Step 5: Deploy it to the screen
A playlist reaches a screen through a group: you deploy a playlist to a group, and every screen in that group plays it. With one screen this is a single click; with fifty it is still a single click.
In the playlist, click Deploy to group and choose the group your screen is in. The Zero 2 W downloads the files over Wi-Fi and starts playing them. The Groups page shows when each group was last deployed and how many of its players are online.
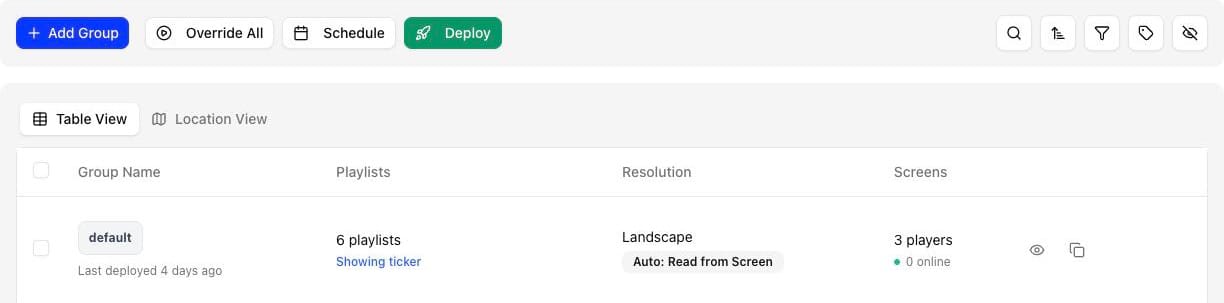
The Groups page. Each row shows the group's playlists, its screens and when it was last deployed.
From now on the board needs no attention. To change what is on the TV, edit the playlist in your browser and deploy again. If the internet goes down, the screen keeps playing the files it already has.
What a Zero 2 W does well, and where it stops
The Zero 2 W is the right board for a screen that shows images, videos and PDFs full screen. It has 512 MB of memory and one HDMI output, and that sets its limits.
Works well on a Zero 2 W
- Images and PDF files, full screen
- H.264 video up to 1080p
- Schedules, TV off and on, playing while offline
Use a Raspberry Pi 4 or 5 instead
- Web pages and HTML widgets, which need a full browser
- 4K video
- Two displays from one player
If you outgrow the board, nothing is lost. Register a larger Pi in the same group and it plays the same playlists.
Where to go next
- Schedule by time of day. Give each playlist a time and days in the group, for example a breakfast menu until 11 am and a lunch menu after.
- Save power. Set the hours the TV should be off in the group settings.
- Add your second screen. It is free too. Register it in the same group and both screens stay in step with one deploy.
The PiSignage help centre covers each of these, and the 5.6 release notes list everything the player can do on this board.
Frequently asked questions
Can a Raspberry Pi Zero 2 W play video for digital signage?
Yes. With the PiSignage player image it plays H.264 video up to 1080p, using the board's hardware decoder. It does not play 4K video.
Which files can it show?
JPG and PNG images, H.264 MP4 videos and PDF files.
Does the screen keep playing without internet?
Yes. The player stores the files on its SD card and keeps playing them if the connection drops. It needs the internet only to receive new content.
How much does PiSignage cost?
The first 2 screens are free. After that, each new player costs $35 for the first year and $20 a year from the second year. See PiSignage pricing.
Can I use a Raspberry Pi 3, 4 or 5 instead?
Yes. The downloads page has one image for the Pi 3 and one for the Pi 4 and Pi 5. The steps in this guide are the same.